Tuesday, June 21, 2011

Homemade Yarn Swift Cheap and Easy!

Hi Everyone,
So my latest project was to make a yarn swift. I do sell them so I could obviously buy one fairly cheap. But a penny saved is a penny earned. So I just earned a nice little chunk of change to buy more yummy yarn with!!! A long time ago I had come across a site that gave instructions on how to make one and I bookmarked it and figured I'd get back to it when things settled down. Well then my computer crashed and I haven't been able to find the site again. So I went with what I could remember (which wasn't much) just that I needed a computer chair. You know the type with wheels/ casters. Well I had one in the garage that we haven't used in ages so here is what I did... oh first for those of you that don't know what a yarn swift is for. Some yarns mainly the ones that come from LYS (Local Yarn Stores) come in hanks instead of skeins. A hank is how the yarn comes after it is spun it is basically yarn twisted well you can't exactly work off of a hank as you will quickly end up with a big twisted tangled mess of yarn. So what you need to do is turn the hank into a skein or ball. So one way to do this is to have someone hold the hank while you unwind it and turn it into a ball. And the other way easier way is to have a yarn swift and a yarn ball winder ( LOVE MY WINDER) The swift will hold your yarn and spin while you wind or ball it. A yarn ball winder is great because it gives you a center pull ball of yarn. But I have a tutorial coming up on how to use an empty toilet paper roll to make a center pull ball of yarn so stay tuned :)
1- First thing I did just to make life easier for me was unscrew the chair from the base. If your chair doesn't come apart like mine did no big deal just move on to the next step.
2- Remove the casters (set aside you might come across another project that calls for casters!)
3- I used some majic markers that I had laying around to put in the holes that the casters left behind. My markers were to thin so to make them fit more snuggly I wrapped a bandaid at one end. So you can use anything really and modify it to fit snuggly (so the markers don't fly off as you are winding your yarn)
4- Then just place your hank on it and ball it up I used my yarn ball winder but you can wind it in whatever method you choose.
My chair ended up being to big so I only used 3 of the "legs" you'll see in the photos how I improvised. But hey it worked and my husband is super happy he doesn't have to hold the yarn for me anymore!


Well I hope this small tutorial helps someone save some money. Have a great day!

Friday, June 17, 2011

T-Shirt Yarn Tutorial

I know that there are several tutorials out there for T-shirt Yarn, but I am writting this one up for my wicked Step-Mother as she is being super awesome and making me some with her used T-shirts! Also I wanted to have this tutorial up for some future patterns/ projects that I will be working on and posting so I wanted to have a quick reference for you guys to have... Plus I didn't want you guys to have to leave my page to find instruction muaahahaha (supposed to be that scary laugh! lol)

Materials:
Used t-shirts
Scissors

List of Materials that make life MUCH easier:
Used t-shirts that do not have side seams
rotary cutter
self healing rotary mat the bigger the better
omnigrid ruler 6"x 24" works great
yarn ball winder

If you don't have the extra materials no biggy you can still make t-shirt yarn. The extra materials just make it faster and more accurate. As the self healing mat hat a measurement grid on it and so does the ruler so you can make all of your strips the exact same size. And it saves your hands I had so much to make that I would have gotten blisters using scissors for all of it. Ok so on to the instructions.

Lay your t-shirt out in front of you. Try to get all the wrinkles out and make it as straight as you can.

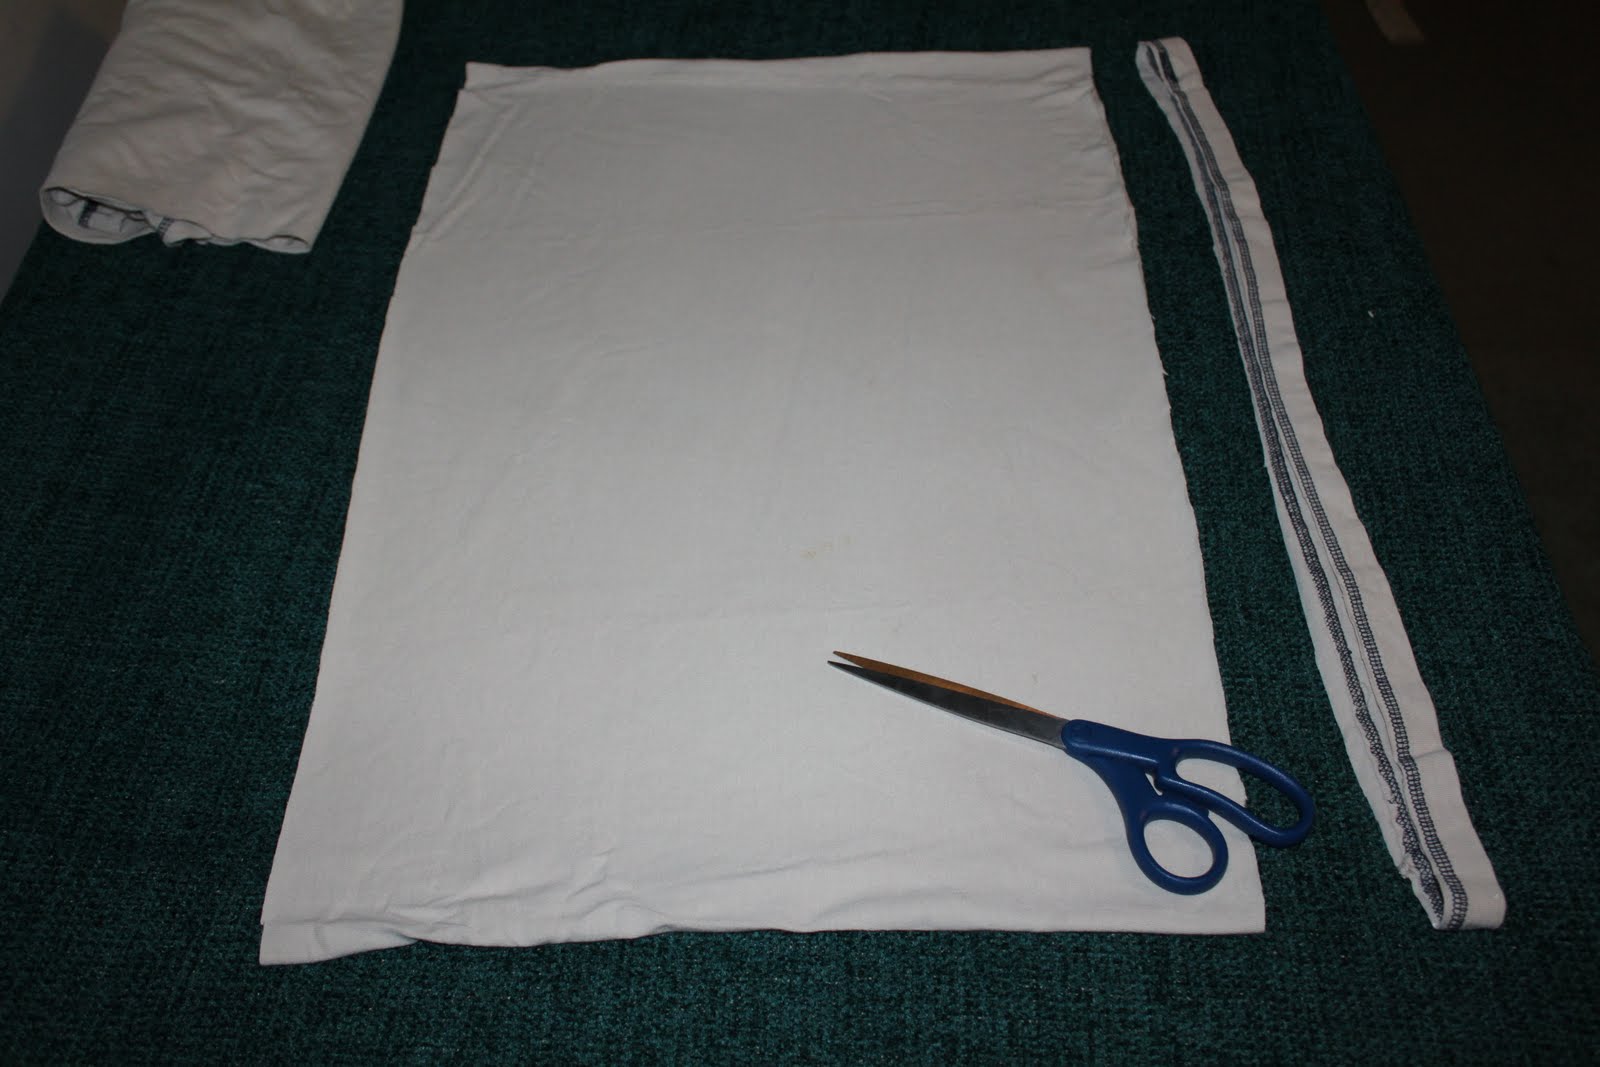
 And now cut straight across the top from right under the sleeves so that you are left with a tube (the torso of the t-shirt)
Now Cut the bottom seam off

With the tube you have left cut strips of about 1" but DO NOT cut all the way up leave about 1 " uncut so you end up with something that resemble a hula skirt :) (depending on how thick or thin you want your yarn to be) This is also where a self healing mat, ruler and rotary cutter come in handy.


Continue cutting in one inch strips all the way across. When you are done it should look like this
Here is a close up of the top of the shirt (where you should have left 1" uncut)
Now "open" up the top where it was left uncut so that it looks like this
Now here is another important part with a pair of scissors cut diagonally from the 1st strip on the right to the 2nd strip on the left. Then the 2nd strip on the right to the 3rd strip on the left. And continue in this manner to the end. Leave the 1st strip on the left uncut for now do that at the end to avoid confusion.What this will do is give you a long strip of continuous "yarn".

This photo is the 1st cut
This photo is the second cut

Now when you are done you will have a LONG strip of 1"inch fabric
Now the fun part. Grab your fabric and tug on it. Continue tugging to the end of your strip. What this does is curl your strip. To make it look like a long tube or "yarn". This also makes your already long strip into a LONGER strip of yarn.

Then all you have to to is ball it up! If you have a yarn ball winder it comes in handy here especially if you have a lot of t-shirts to do. (BTW I sell yarn ball winders manual and electronic just visit my website and I'll be happy to send one your way!)


And that's it. I hope you guys enjoyed and understood this tutorial. I'd love to hear your comments. Stay tuned for patterns using t-shirt yarn.

Mickey/ Minnie Mouse inspired Crocheted hat Pattern

Good Afternoon Everyone! Here is my Mickey/Minnie inspired Hat pattern. If you look thru my blog you will find matching diaper cover crochet pattern as well. Me posting these on a blog is so that people can enjoy my pattern for PERSONAL use only. Example of personal use Mom making set for her child. My only source of income is selling my patterns and my completed items so please if you plan on selling items made by any of my patterns do me the courtesy of purchasing it it is only $3.99 for the hat and diaper cover in sizes newborn thru 12 months or $5.99 for both Mickey and Minnie Patterns. Well enjoy and please leave comments I love to read them! and don't forget to make the matching Mickey Inspired Diaper cover! :) 

Designer: Cristina Barnes
Company: Affordable Wonders
Copyright, 2011, Cristina Barnes & Affordable Wonders
Size Newborn, 3-6 Months, 6-12 Months More sizes to follow
You may not sell your finished items. Permission is not granted to copy or distribute this pattern in any manner. Please do not post the instructions for this pattern on any blogs or websites. Small alterations are still considered part of this pattern.  Photos may be posted providing my website where the pattern can be purchased is included. You can also send people to my blog on where they can view the pattern. Pattern on website is only for personal use. In order to sell items made by my pattern you must purchase my pattern. I believe that is fair. Thank you for respecting my wishes.

Crochet Hook Sizes:  J, G6
NOTE: CH 2 counts as HDC throughout the pattern
Gauge for Mickey Hat: 2”x2”=8 Rows 7 HDC


Size Newborn

1)      CH 3 SLST to join, CH2 make 7 HDC in ring SLST to of CH2 to join. (8 HDC)
2)      CH2  1 HDC in same stitch, 2 HDC in each HDC around, SLST to top of CH2 to join (16 HDC)
3)      Ch2  1 HDC in same stitch, *1 HDC in next ST, 2 HDC in next ST* Repeat from * around SLST to top of CH2 to join (24 HDC)
4)      CH 2 1 HDC in same stitch, *1 HDC in next 2 ST, 2 HDC in next ST*  Repeat from * around SLST to top of CH2 to join (32 HDC)
5)      CH 2 1 HDC in same stitch,  *1 HDC in next 3 ST, 2 HDC in next ST* Repeat from* around SLST to top of CH2 to join (40 HDC)
6)      CH 2 HDC in next ST and each Stitch around SLST to top of CH2 to join (40 HDC)
7)      Repeat Round 6,  Five(5) times.
8)      CH1 SC in each stitch around. SLST to join (40 SC)
9)      Repeat round 9 one time and fasten off. Weave in ends

Size 3-6 Months

1)      CH 3 SLST to join, CH2 make 7 HDC in ring SLST to of CH2 to join. (8 HDC)
2)      CH2  1 HDC in same stitch, 2 HDC in each HDC around, SLST to top of CH2 to join (16 HDC)
3)      Ch2  1 HDC in same stitch, *1 HDC in next ST, 2 HDC in next ST* Repeat from * around SLST to top of CH2 to join (24 HDC)
4)      CH 2 1 HDC in same stitch, *1 HDC in next 2 ST, 2 HDC in next ST*  Repeat from * around SLST to top of CH2 to join (32 HDC)
5)      CH 2 1 HDC in same stitch,  *1 HDC in next 3 ST, 2 HDC in next ST* Repeat from* around SLST to top of CH2 to join (40 HDC)
6)      CH 2 1 HDC in same stitch, * 1 HDC in next 4 ST, 2 HDC in next ST* Repeat from * around SLST to top of CH2 to join (48 HDC)
7)      CH 2 HDC in next ST and each Stitch around SLST to top of CH2 to join (48 HDC)
8)      Repeat Round 7, six(6) times.
9)      CH1 SC in each stitch around. SLST to join (48 SC)
10)   Repeat round 9 one time and fasten off. Weave in ends


Size 6 – 12 Months
1)      CH 3 SLST to join, CH2 make 7 HDC in ring SLST to of CH2 to join. (8 HDC)
2)      CH2  1 HDC in same stitch, 2 HDC in each HDC around, SLST to top of CH2 to join (16 HDC)
3)      Ch2  1 HDC in same stitch, *1 HDC in next ST, 2 HDC in next ST* Repeat from * around SLST to top of CH2 to join (24 HDC)
4)      CH 2 1 HDC in same stitch, *1 HDC in next 2 ST, 2 HDC in next ST*  Repeat from * around SLST to top of CH2 to join (32 HDC)
5)      CH 2 1 HDC in same stitch,  *1 HDC in next 3 ST, 2 HDC in next ST* Repeat from* around SLST to top of CH2 to join (40 HDC)
6)      CH 2 1 HDC in same stitch, * 1 HDC in next 4 ST, 2 HDC in next ST* Repeat from * around SLST to top of CH2 to join (48 HDC)
7)      CH 2 1 HDC in same stitch, *1 HDC in next 5 ST, 2 HDC in next ST* Repeat from* around SLST to join (56 HDC)
8)      CH 2 1 HDC in next ST and each Stitch around SLST to top of CH2 to join (56 HDC)
9)      Repeat round 8 6 times (56 HDC)
10)   CH 1 SC in each ST around SLST to join (56 SC)
11)   Repeat round 10 one more time and fasten off. Weave in ends

EARS
Hook: G6 and Black Yarn, Stitch Marker would be very helpful here J

1)      CH 3 SLST to join CH 2 9 HDC in loop do not join
2)      *2 HDC in each ST* repeat  around
3)      *2 HDC in next ST, 1 HDC in next* repeat around
4)      *2 HDC in next ST,  1 HDC in next 2 ST* repeat around
5)      * 2 HDC in next ST, 1 HDC in next 3 ST* repeat around
6)      *2 HDC in next ST, 1 HDC in next 4 ST* repeat around
7)      *2 HDC in next ST, 1 HDC in next 4 ST* repeat around SLST to join Fasten off with long tail for sewing. Repeat for other ear.

Minnie Mouse Bow:
Hook: G6             Yarn: Red (or color of choice) Gauge 1”x1”= 5 HDC x 4 Rows
Measures approx 5” x 2 ¾”
1)      CH 12 HDC 2ND CH from hook and each ST across
2)      CH 2 turn HDC across
3)      Repeat row 2 for 16 rows (should measure approx 5” x 2 ¾”)
4)      Optional SC around the entire piece SLST to join and fasten off. Weave in ends.

With a long piece of yarn (approx 12”) wrap yarn around the middle of the rectangle and tie off. Then fan out the two sides to shape bow. You can then either sew bow to top of hat or put a snap barrette on bottom  to make bow removable.


Extra tips and Note!! Don’t forget to read J

Thank you for purchasing my pattern. I am attaching two PDF's the Mickey Diaper cover and  Mickey Hat pattern to complete your set. If you have any questions please feel free to contact me via email. Also to make the hat firmer you can make the hat using two strands of yarn held together throughout and J hook Increasing until the diameter measures Newborn: 4", 3-6 Months:5", and 6-12 months 6" then work downward until hat measures Newborn: 4.5", 3-6 Months 5.5" and 6-12 Months 6.5" and for the ears also holding two strands of yarn throughout and H hook 5mm work increasing until diameter measures 3" then add one last round to give the ears depth and bind off. This set of instructions is just to make the hat a lot more firm. Now my photos are using just one strand so it will look cute either way. Well I hope this made sense to you and again if you have questions or need me to clarify it more please just contact me.

Wednesday, June 15, 2011

Self Healing Rotary Matt

Good Morning Everyone,
I had one of these compulsive needs to blog about my latest buy. I just purchased a self healing mat. As expensive as they cost I just couldn't justify it to myself as I don't sew or really do anything with fabric in the volume that would call for a mat... Or so I thought!

After moving to our new house we of course did some spring cleaning and went thru our clothes that both my husband and I were hanging on to thinking yeah one day we would be able to wear it again. We both finally realized that if that day ever came we could just buy them again. So I started my mission of accumulating as many t-shirts as I could to make t-shirt yarn out of. 

I had been cutting it by hand with a pair of scissors and eyeballing the width of the strips but me being somewhat OCD couldn't handle that the strips weren't perfectly uniform. A friend of mine had given me a rotary cutter and ruler that she had extras of (thanks to a yard sale find) but me being a hook and needle girl I just didn't see what the big deal was with these items but I did take them I'm also somewhat of a craft supplies hoarder! In my mind though I just couldn't make the connection why not use a cardboard box or the floor. So I grabbed a t-shirt and tried using a cardboard box as my "mat" yeah that didn't work blade just cut thru the box and got stuck t-shirt was ripped and I was frustrated. I blamed my failure on the rotary cutter. Well I had a small 6 x 6 self healing mat with ironing board that I bought on clearance for less than $5. So I tried just cutting the sleeves and I was so surprised a perfect cut! So that lead me on a mission. I still couldn't see myself paying $55 for one but thanks to 50% coupon at Michaels I bought a pretty big mat for under $30!! 

When I got home with my new buy I ran to get a t-shirt to cut and timed myself. From T-shirt to t-shirt yarn it took 4 min 15 sec to complete!!!! It was incredible. So for this month that Mat is totally the best thing I've bought! If you are in the market for one I say go ahead and buy there is nothing like it! Save yourself a ton of money buy finding yourself a coupon for 50% off of one item. Michael's accepts competitors coupons so if Michael's doesn't have one for that week check AC Moore's Jo-ann Fabrics and Hobby Lobby's websites for coupons!

Well I just had to get that off my chest... Husband would never understand my excitement.  


Thursday, April 28, 2011

Angelika's Yarn Store

Everytime I come across exceptional service I feel that it should be announced to the world... Or ok to be more resonable my readers. A lot of you that end up on my site are knitters and crocheters so you may be able to appreciate this. The other day I was searching online for a couple of things well my search landed me at a Yarn Store in Oregon named Angelika's Yarn Store. I placed my order my order arrived way faster than I expected it I did have to contact her to make a few questions but what I didn't expect was the customer service that I recieved. Ok well let me give you a little background on me and my experience. Where I live we do have a LYS which will remain nameless I defineately wouldn't want to send any business their way. It is in an uppity part of town which is understandable considering the small town I live in. So it being a small business and above all a yarn store I went in. I guess I wasn't dress the part because everyone stopped what they were doing to stare at me (there were a group of ladies obviously regulars sitting at a table for social knitting hour) well determined to look at their stock I walked right past the table and started looking around then the owner asked if she could help. So I thought well ok at least the owners were nice. I mentioned what I was looking for and her response was that it was expensive! SERIOUSLY! I also asked if they had pattern books (can never walk out of yarn store without a pattern book) well I was looking for a crochet book it was like I said a dirty word. I hated spending one red cent in that place but I really needed the yarn so I only bought what I needed for the project and have never gone back... Ok so back to Angelika's she was beyond helpful and uber friendly and sooo accomodating that I will continue to order from her shop. Outside of yarn she also carries knitting machines and stands (totally on my must have list) software, wool wash you name it she has it.... ok ok maybe that was an exaggeration but if you have knitting or crocheting needs be sure to check her shop out and if you are in her local area I'm sure she's just as friendly in person. Just follow this link Angelika's Yarn Store.

Thursday, April 21, 2011

Easy Crochet Hairbow

As promised another super easy Hairbow this time for all the crocheters! Make these in every color. Great way to work on that scraps stash and have gifts on the ready! Or if you have a little girl of your own she will have a ton of hairbows to match everything she wears! In one of the Pictures you will see that The bow is on a rectangle. To make this one follow the instructions for the bow. But for one bow finish the instructions all the way thru and the other one crochet all the way to the end of pattern but don't do the finish then just sew the bow on the rectangle. I used worsted weight yarn but these can be made with any yarn just adjust a little on the beginning chain and how many rows you do.
Please don't sell items made with this pattern or the pattern itself. You are welcome to post a link back to my blog. I want to continue to post free patterns for everyone I just ask that you don't make a profit on my patterns.

I used WW yarn and H hook Guage is not important.

  1. CH 12 HDC in Second CH from hook and each across
  2. CH 2 HDC in each stitch across
  3. Reapeat Row 2 for 3 more rows
  4. Fasten off and weave in ends
Note: you can do a round of SC if you'd like for a more finished look.
Now fold rectangle as you would a paper fan and with a strand of yarn about 12" long wrap several time thru the middle of "fan" and secure with a knot (when I do it I start by "sewing" thru the fan first then start wrapping that way it never falls apart) weave in your end and slip an alligator clip thru the back and your done!

Uses: you can use this alone just as a hairbow in little girls hair. Or use it as an applique on a Hat, headband even scrapbooking!
Please leave your comments and I'd love to see your creations!

Sunday, April 17, 2011

Mickey Mouse Inspired Diaper Cover Crochet Pattern

Mickey Mouse Diaper Cover Crochet Pattern

Posted by Cristina Barnes on March 14, 2011 at 7:18 PM

Hi Everyone,
Before we get to the pattern I wanted to say a few things. I started writing my patterns because as much as I have looked around there are very rarely good Free patterns. And I have purchased patterns that were great. So I wanted to offer what in my opinion are "good" patterns for free but there is a catch. If you use my free pattern they are for your personal use or for you to make as a gift or donation to charity. If you would like to sell items made with my pattern I ask that you purchase the pattern from me. I think that is a reasonable request and my patterns will never exceed $4.99. They will be emailed to you in PDF Format. A lot of work goes into writing pattern a lot of crocheting and pulling apart because it isn't looking great and restarting. So I just ask that you respect that and that way I will continue to post patterns for you guys :) I would like to ask that if you do make something to sell with my patterns to place a l link to my website. Also I do ask that you do not repost my patterns free or purchased. If you'd like to mention my patterns somewhere post a link back to my blog. Ok with that said here goes my rendition of Mickey Mouses Diaper cover! Please leave comments as I love to hear what you think.

To purchase pattern just go here :) Micky Mouse Diaper Cover Crochet Pattern

Mickey Mouse Costume
Diaper Cover and (Hat soon to follow)
Designer: Cristina Barnes
Company: Affordable Wonders
Copyright, 2011, Cristina Barnes & Affordable Wonders
Creative Commons License
Mickey Mouse Diaper Cover and Hat by Cristina Barnes is licensed under a Creative Commons Attribution-NonCommercial-NoDerivs 3.0 Unported License.
Permissions beyond the scope of this license may be available at http://affordablewonders.com.
Abbreviations:
SC = Single Crochet
HDC= Half Double Crochet
DC= Double Crochet
FPDC= Front Post Double Crochet
SLST= Slip Stitch
Size 3-6 Months More sizes to follow
Permission is not granted to copy or distribute this pattern in any manner. Please do not post the instructions for this pattern on any blogs or websites. Small alterations are still consider part of this pattern. Photos may be posted providing my website where the pattern can be purchased is included. You can also send people to my blog on www.affordablewonders.com where they can view the pattern. Pattern on website is only for personal use. In order to sell items made by my pattern you must purchase my pattern. I believe that is fair. Thank you for respecting my wishes.
Materials: Worsted Weight Yarn ( I used Caron’s Simply Soft) In colors Black, Red, Yellow
Crochet Hook Sizes: H 8, J, F and G 6
Gauge for diaper cover: 2”x2”= 6 Rows 8 HDC
Gauge for Mickey Hat: 2”x2”=8 Rows 7 HDC
1) Chain 30, HDC in second stitch from hook and each stitch to end
2) Ch 2 turn HDC in each stitch across
3) Repeat step 2 four times
4) Ch 1 turn SLST in next four stitches Ch 2 HDC across the row leaving four stitches unworked
5) Ch 1 turn SLST in first Stitch Ch 2 HDC across leaving one stitch unworked
6) Repeat step 5
7) Ch2 turn HDC in each stitch across
8) Repeat Row 7 five more times Then fasten off.
Repeat steps 1 thru 7 again for the back piece
Place right sides together and sew crotch and sides
Finishing
1) Attach yarn at leg opening one stitch before the crease CH 1 then SC around the leg opening evenly.( I came up with 49 SC) SLST to join. View 1st Photo
2) CH 3 1DBC in next 9 SC, SC in next 30 SC, 1DBC in next 9 SC SLST to join
3) CH 3 FPDC in each DC (9FPDC) SLST in each SC (30 SLST) 1 FPDC in each DC (9 FPDC) SLST to join. Fasten off and repeat for other leg. See Photo 4 and 5
(TIP: If your numbers aren’t exactly like mine for the leg opening no need to worry  Look at Photo with Crochet hook across the cover. What we are doing in this round is Making HDC and FPDC to about that point then SC and SLST for the rest!)See Photo 2
Yellow “Buttons”
With F Hook and Yellow CH 2 Make 6 SC in second CH from Hook. Make 6 SC then continue without joining and make 2 SC in each SC (12SC) Fasten off leaving a long tail for sewing. Make 3 more circles then sew on Diaper cover View photos for placement.
Tail
With H hook and Black CH 40, SC in 2nd CH from hook and next 3, HDC to end and fasten off. Sew Tail about one inch below the yellow circles in the center.